How To Do a Headstand Yoga: Step-by-Step Instructions
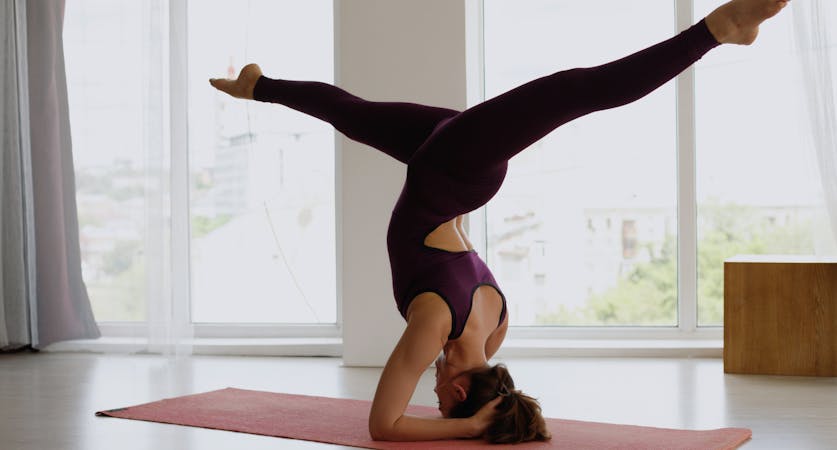
A headstand (Shirshasana), as you would imagine, involves the yogi standing on their head. However a headstand involves a lot more than simply to balance on the head! In particular, the weight distribution across the forearms and the activation of the shoulder blades in combination with the alignment and placement of the pelvis are key to finding headstand.
Headstand is an inversion, meaning that the asana involves the heart and the head being above the hips and the feet. Practicing headstand means you will be upside down, in a new orientation to the ground. It is commonly referred to as the king of all yoga poses.
Benefits of Headstand Yoga
Note: in this section you need to provide benefits of headstand yoga. Write a few introductory sentences and provide the rest of the information in the form of bullet points. It would be nice if you will find links to health resources to support your statements. (how Healthline does it)
Why attempt headstand? Usually it’s a pose that puts many adults into a state of fear (maybe the last time you were upside down was as a child, when you would have a go at anything!). But here are some benefits I have personally found from my own practice:
- First of all, being upside down is fun! It allows you to break out of your normal conventions and connect with your inner child – who would dare to fall, play and not take life too seriously.
- Headstand demands a certain focus. There’s a lot to think about in relation to what the body needs to do to get you in a stable headstand. So with all your attention on these details, the larger things that you might have spent the rest of your day worrying about for those few moments can take a back seat – amazing!
- Headstand takes a certain precision and focus to achieve. When headstand is mastered it can become an extremely meditative pose.
- Mastering headstand will prepare you for many other physically advanced asanas including pincha mayurasana and handstand.
- When you invert, you increase blood flow to your brain which can improve the body’s ability to regulate blood pressure. This improved blood circulation has many positive effects including an increase in focus and mental function, improved eyesight and better digestion.
- It strengthens your shoulders, arms and core – you will be able to find more precision in activating these areas of the body
- It’s energizing, relaxing and will give you more confidence!
Note: many of these benefits arise out of practicing the pose for many hours a day! Little by little you will see small changes but don’t expect changes overnight!
Warnings and restrictions
Note: in this section you need to provide restrictions of headstand yoga. Write a few introductory sentences and provide the rest of the information in the form of bullet points. It would be nice if you will find links to health resources to support your statements.
Headstand is a challenging pose and so should be practiced with care. It is a perfectly safe pose to practice, however it is usually when students ignore the importance of getting the foundations of the pose that it can become unsafe. I would always recommend working with a teacher where possible or following precise and clear instructions. Here’s what you should be aware of:
- First of all, don’t be a kicker - you will not find the balance and could twist the body and fall in ways which the body cannot support causing injuries. Learn slowly and be patient so that you know you have full control of the pose.
- Learn how to fall safely without hurting the neck. The neck is at risk in headstand if the practitioner doesn’t support it.
- To an extent - and definitely at first - a small amount of pain in your head can be normal but assess the pain. Know what is too much and what is a bad pain. You can redistribute that weight on your head by using the forearms and shoulders. Often this comes with time and as your practice improves.
- For women on your menstrual cycle traditionally in yoga you are advised not to invert. Personally, I have still always inverted – but you might feel a little more uncomfortable than normal considering you have an additional blood flow happening which will also be inverted here! Listen to your body – you know what feels ok or not. If you have a heavy flow, maybe don’t practice headstand on these days.
- If you are working with any medical conditions then you should check with your GP whether practicing headstand would be safe for you.
- If you are pregnant and starting yoga for the first time I wouldn’t advise practicing headstand. Many yogis who have been practicing before pregnancy, however, will continue during pregnancy, but again this is due to the awareness they have of their body and their practice which means they can conduct this safely.
How to do a Yoga Headstand
When I teach beginners headstand I always begin with a tripod headstand*. Tripod headstand is generally a good place to start because it allows the yogi to use the hands and strength in the arms to support the pose. Also a note to say that this a step by step and each position within it, is already an expression of headstand. Take the time to get to know each step and build the strength to be in that position before moving onto the next.
STEP 1
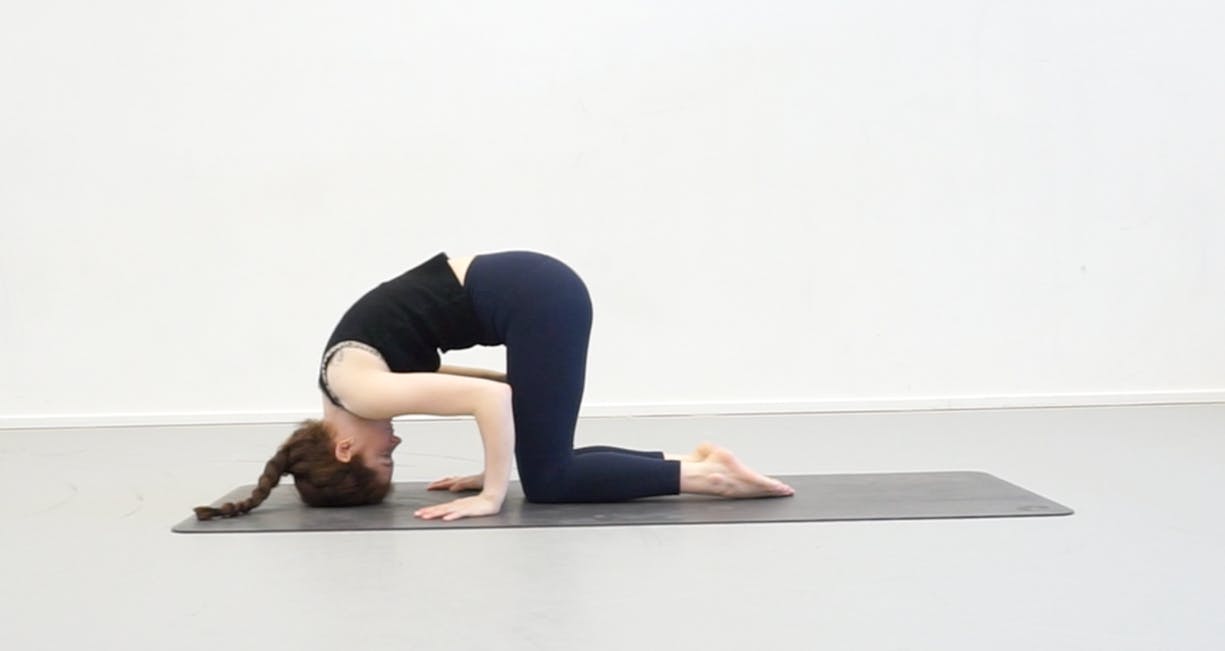
Place your hands down under your shoulders, hug the shoulder blades towards one another so that you create “shelves”with your arms or, as you can see in the image, a right angle. You will then create a triangle with your head. Your head does not go in between your hands, but it goes slightly in front.
STEP 2
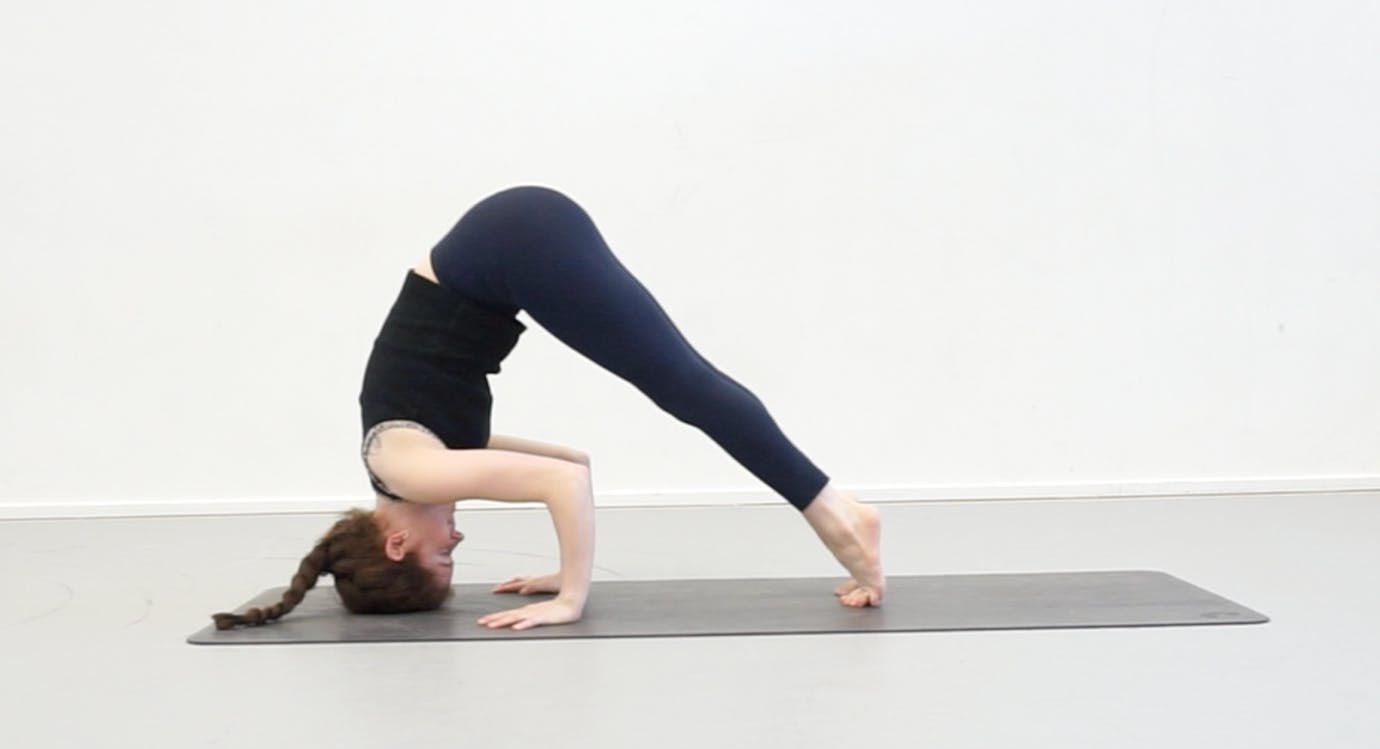
Maintain the hugging action of your shoulder blades so that you feel strong and supported. Tuck your toes and attempt to lengthen your legs. How easy this is will depend on the length of your hamstrings. This may be enough for you to experience headstand but if you feel you can continue, read on!
STEP 3
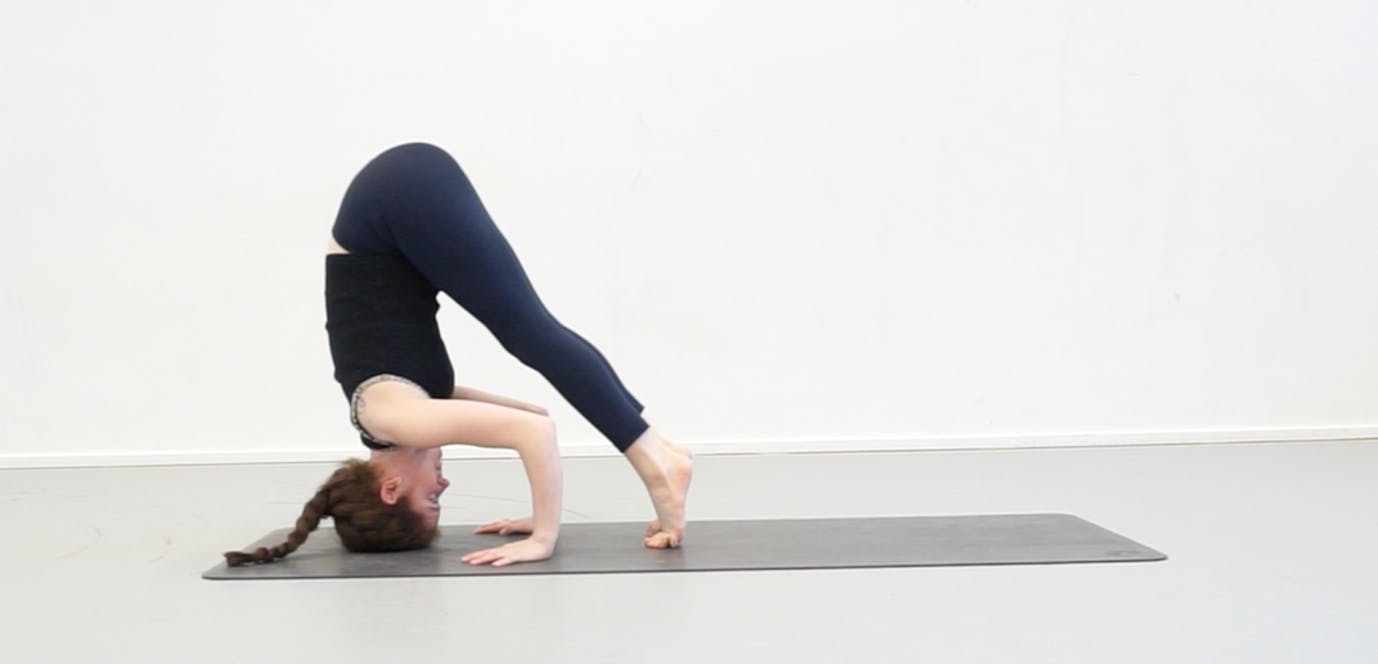
Walk the feet in as close to your body as possible (if it is not possible you can also bend your knees). Again this may be enough and is a great start!
STEP 4
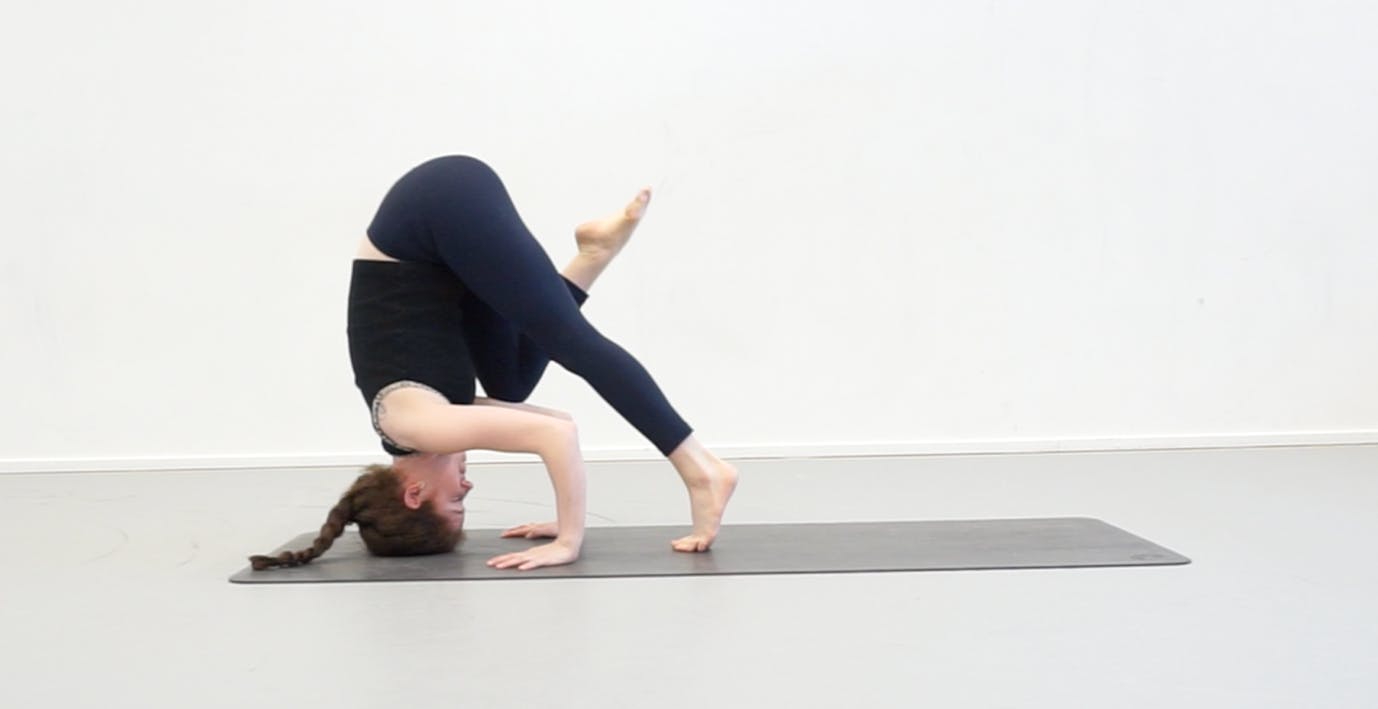
When walking in you are getting closer to your elbows. Now you can start to test if you can start taking the legs away from the floor. Try bringing one leg onto the “shelf” you have created, bring it back to the ground and then try with the other leg. Continue to hug the shoulder and the arms towards one another as you do this. And if that feels comfortable...
STEP 5
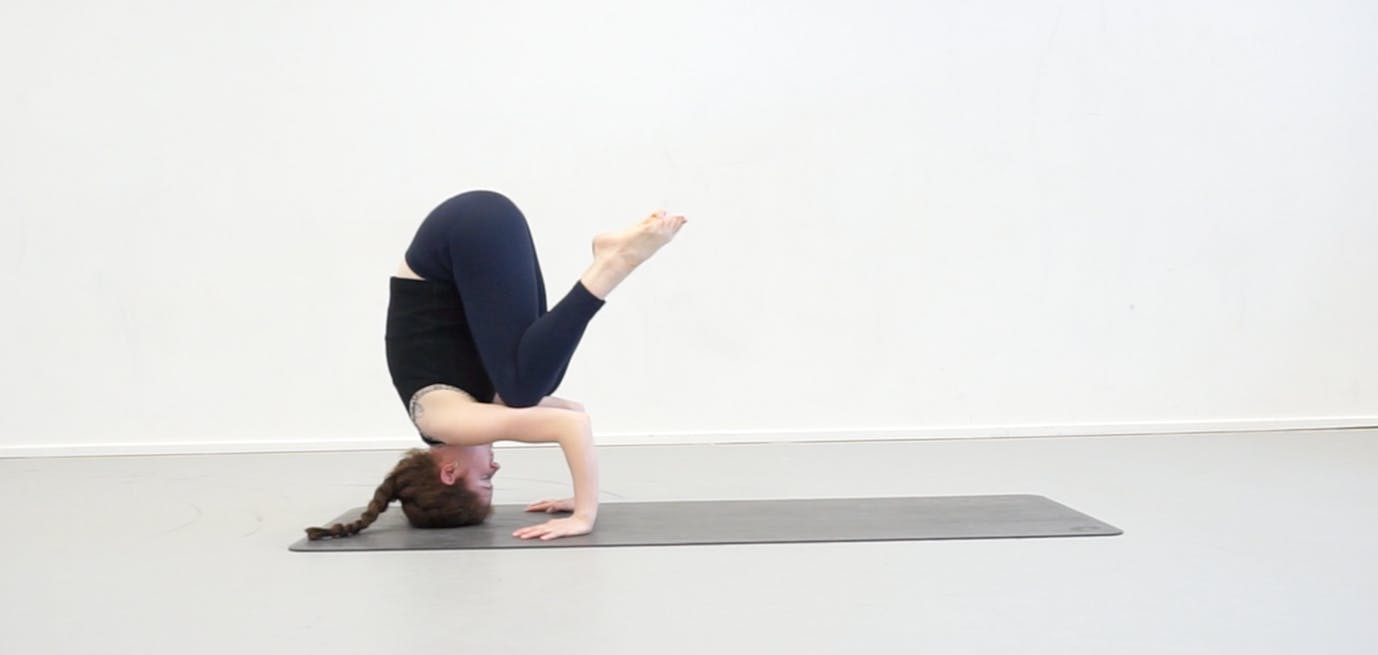
Try both legs at the same time. You are in a half tripod headstand. I always advise students to spend a bit of time getting comfortable here before thinking about going further.
STEP 6
Often where people go wrong is they sacrifice the desire to get the legs up for the control over the body, which is ultimately what is going to bring you balance. From here, test if you can start to lift the legs away from the arms, it involves a tilting in the pelvis.
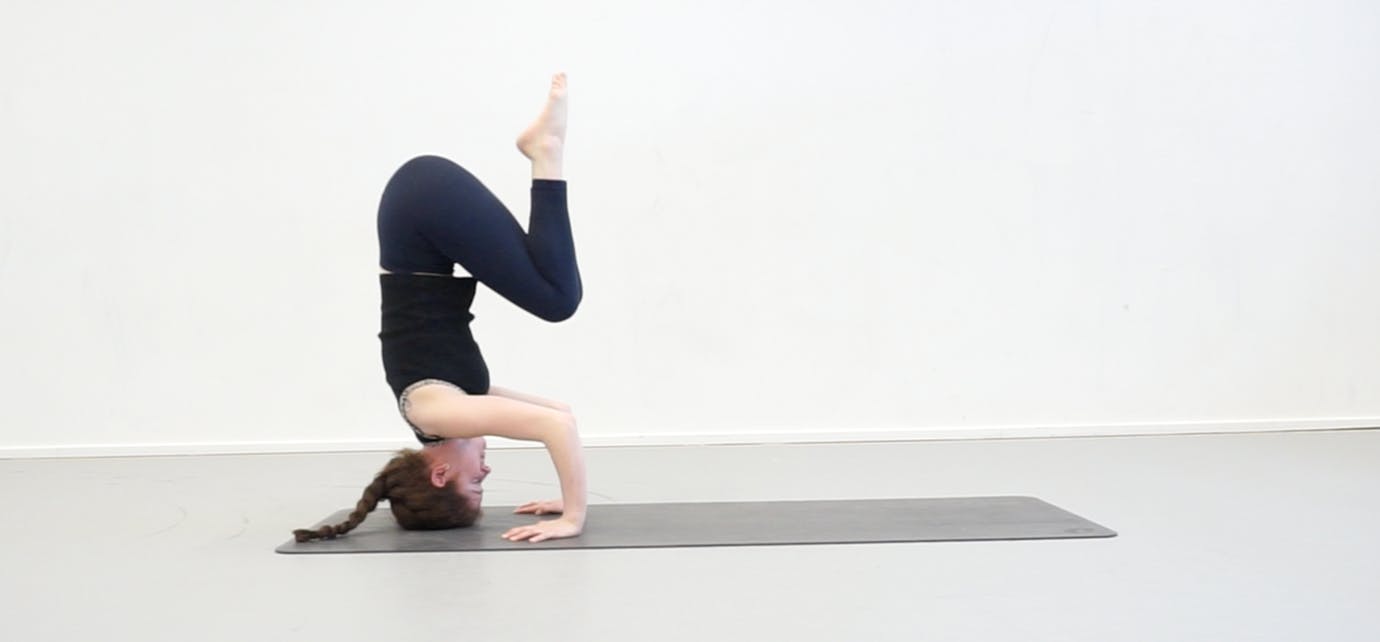
These two images demonstrate how the pelvis needs to move slightly out of line with the spine in order to shift the weight.
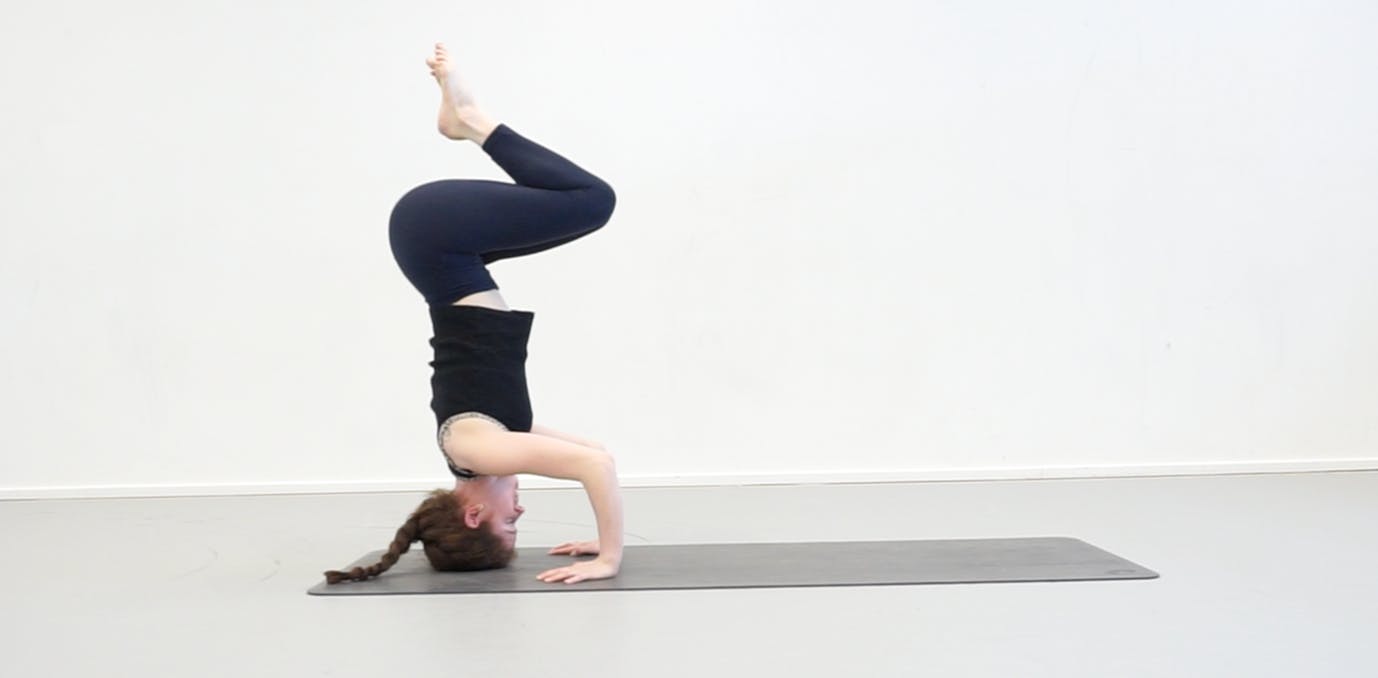
If you can get this feeling of the pelvis tilting, then it is not going to be a problem to then extend your legs fully as you will be perfectly in balance already.
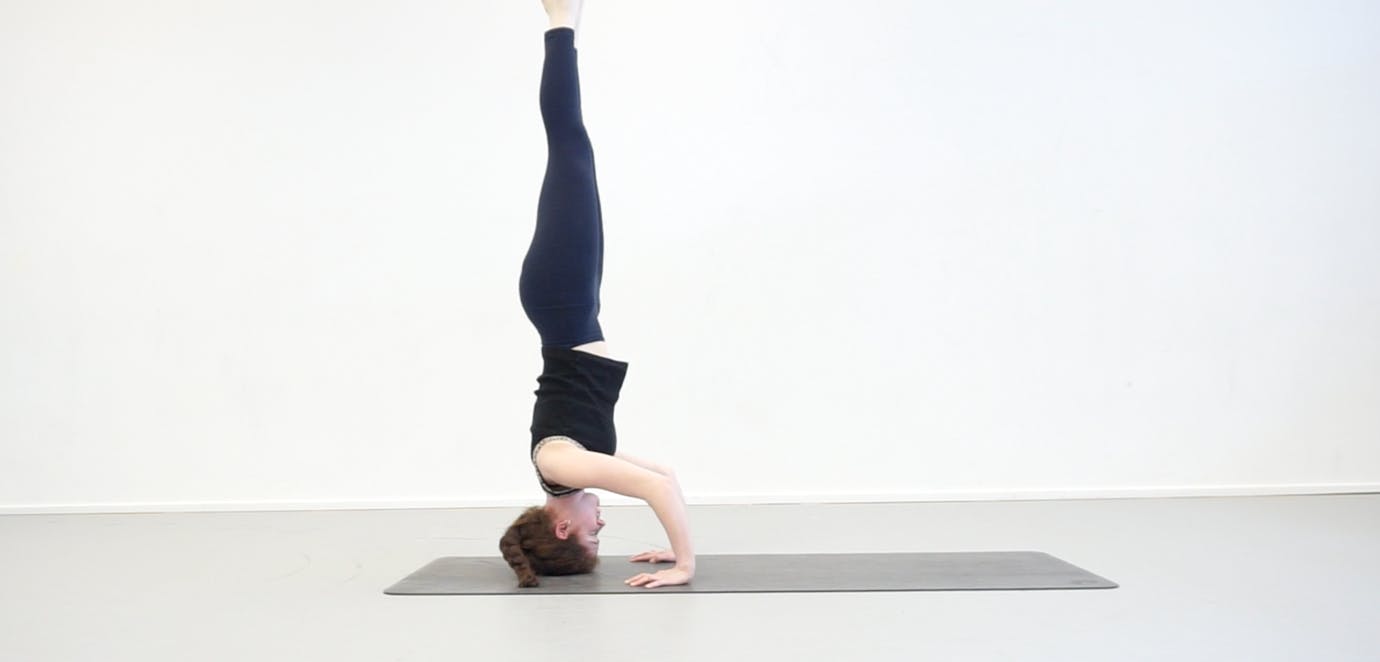
*note there are many variations of headstand and some people find certain variations easier than others.
Variations for beginners
The above step-by-step guide is suitable for beginners but a beginner should stop at the step which feels challenging for them and keep practicing this variation until they feel comfortable and stable in this variation.
FAQ
How long will it take me to learn to do a headstand?
It is different for everybody, because we all have different bodies. Try not to think about reaching the end goal pose, but instead try to enjoy each step and consider each step as the headstand. I encourage headstand to be practiced with patience!
My head hurts, what can I do?
- Press further into the forearms to take the initial weight load off the head
- Fold your yoga mat into three to give you extra cushioning
Can I practice headstand against the wall?
I usually recommend that beginners don’t do this. What tends to happen when the wall is used is that people become too reliant on the wall and stop activating the areas of the body which are needed to support the pose. When the body gets used to this it is harder to practice headstand away from the wall as relying on the wall has become a habit.
